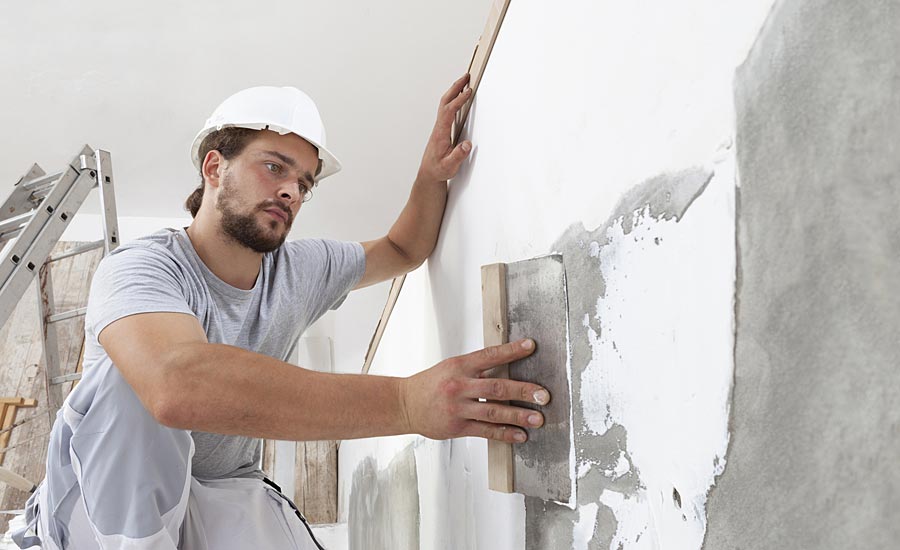
Internal plastering is a key aspect of interior finishing, creating smooth, attractive walls and ceilings that serve as the perfect backdrop for paint, wallpaper, or other decorative elements. A well-done plaster job not only enhances aesthetics but also provides durability, thermal insulation, and acoustic benefits to your living spaces. In this expert guide, we’ll walk you through the essential techniques for internal plastering, the benefits it offers, and useful tips for achieving a flawless finish.
Understanding Internal Plastering: Why It’s Important
Internal plastering is more than just a surface finish; it strengthens walls, offers a layer of insulation, and makes surfaces ready for various decorative treatments. Proper plastering techniques help prevent wall cracking, moisture damage, and uneven surfaces, resulting in a space that feels polished and complete.
Key Benefits of Internal Plastering:
- Aesthetic Appeal: Smooth, seamless surfaces enhance the look of any room.
- Durability: Plastering protects walls from damage and provides a long-lasting finish.
- Thermal Insulation: Some plaster types, like lime, offer natural thermal insulation.
- Soundproofing: Plastered walls reduce noise transmission, ideal for multi-story buildings.
- Fire Resistance: Many types of plaster, including gypsum, are naturally fire-resistant.
Techniques for Internal Plastering
Achieving a high-quality internal plaster finish requires skill, patience, and the right tools. Here are the primary techniques used in internal plastering:
1. Skimming
Skimming is a top layer application that provides a smooth, polished finish to walls and ceilings. A thin layer of plaster is applied over existing plasterboard or a backing coat, creating a seamless surface that’s ready for paint or wallpaper.
- Steps:
- Prepare the surface by cleaning and dampening it.
- Apply a thin coat of plaster with a trowel.
- Use wide, sweeping strokes for even application.
- Smooth the plaster as it begins to dry, avoiding any lines or imperfections.
2. Bonding Plaster Application
Bonding plaster is a base coat used on surfaces with poor adhesion, such as concrete. It provides a solid foundation for the finishing layer, ensuring a durable and long-lasting bond.
- Steps:
- Prepare the wall by removing any dust or debris.
- Apply the bonding plaster with a hawk and trowel.
- Use a straight edge to level the plaster and ensure evenness.
- Allow the bonding layer to set before applying the finishing coat.
3. Two-Coat Plastering
For added durability, two-coat plastering involves applying a base coat followed by a finish coat. This method is particularly effective for uneven walls, creating a level surface.
- Steps:
- Apply a base coat with thicker plaster for filling gaps.
- Level the base coat and allow it to partially set.
- Apply a thin finish coat over the base layer for a smooth, polished surface.
4. Textured Plastering
Textured plastering adds decorative patterns or textures to the wall surface, creating a unique visual effect. Techniques like combing, sponging, or stippling can add character and style to interiors.
- Steps:
- Apply a layer of plaster on the wall.
- Use tools like sponges, combs, or trowels to create patterns before the plaster dries.
- Smooth out any areas as desired, ensuring an even finish.
Types of Internal Plaster for a Perfect Finish
- Gypsum Plaster: Ideal for interiors due to its smooth finish, quick setting time, and fire-resistant properties. Suitable for rooms without high moisture levels.
- Lime Plaster: A breathable, eco-friendly plaster that provides natural insulation. It’s durable but has a longer curing time.
- Cement Plaster: Strong and weather-resistant, though not commonly used indoors due to its weight. Often used in high-moisture areas like kitchens or bathrooms.
- Clay Plaster: Natural and eco-friendly, clay plaster is ideal for sustainable building projects. It provides a unique finish and is breathable, but requires regular maintenance.
Tips for Achieving a Perfect Plaster Finish
- Prepare the Surface Properly: Before applying any plaster, ensure the surface is clean, dust-free, and slightly damp to improve adhesion.
- Use Quality Tools: Invest in high-quality trowels, hawks, and straight edges to achieve smooth, even layers. A good-quality plastering trowel will reduce visible lines and marks.
- Mix Plaster Correctly: Follow manufacturer instructions for mixing plaster. Incorrect ratios can cause weak bonding or uneven drying, resulting in cracks.
- Work in Small Sections: Applying plaster in smaller sections helps maintain an even application, especially for beginners.
- Timing is Key: Allow the plaster to dry partially before smoothing or applying the second coat. Overworking wet plaster can cause imperfections and make the surface less smooth.
- Apply Multiple Thin Layers: For the best results, apply two or more thin coats rather than one thick coat. This ensures even drying and reduces the likelihood of cracking.
- Finishing Techniques: Use a sponge or trowel for final smoothing as the plaster sets, but avoid pressing too hard, as this may create visible marks or dents.
FAQs About Internal Plastering
Q1. How long does it take for plaster to dry?
Generally, plaster takes 24-48 hours to set but may need up to a week to fully dry. The drying time depends on room temperature and humidity.
Q2. Can I paint over freshly plastered walls?
Yes, but wait until the plaster has fully dried. Using a breathable primer or “mist coat” before painting can help the paint adhere better.
Q3. What type of plaster is best for soundproofing?
Gypsum plaster is known for its soundproofing properties, making it an ideal choice for rooms requiring noise reduction.
Conclusion
Internal plastering is a fundamental aspect of creating durable, beautiful interiors. By understanding the different techniques for internal plastering, selecting the right plaster type, and following expert tips, you can achieve a perfect finish that enhances both the look and functionality of your space. Whether you’re going for a smooth modern finish or a unique textured look, taking the time to do it right will yield lasting, professional results.


